How to workaround the following Cisco WebEx error when using Windows 10…

This article is intended to provide support for Windows 10 users who use Internet Explorer 11 to join a Cisco WebEx Meeting but get the following error message…

Support Not Available

Your version of Cisco WebEx does not support Windows 10.  If you want to use WebEx on Windows 10, contact your administrator for more information.

image

To successfully log into a WebEx meeting, do the following:

1. In Internet Explorer 11, left-click on the Tools menu and make sure that ActiveX Filtering is unchecked then left-click on “F12 Developer Tools”

image


A new window appears.  Under the “Emulation” tab the Document mode and User agent string values will need to be changed to be compatible with Cisco WebEx.


image

2) Change Document mode to a value of “9”

3) Change User agent string to a value of “Internet Explorer 9”

The final result should look like this.

image

This should allow you to successfully log into a WebEx session.

That’s all there is to it.  Have a nice day!

Fixing Internet Explorer 11’s Blurry Font issue

This issue started with my first subscription to The Wall Street Journal.  I noticed that when I viewed web pages at www.wsj.com, the fonts always seemed blurry.  Even after adjusting my ClearType settings in Microsoft Windows, the web pages were still not clear.  I even tried switching to a different browser, Google’s Chrome, but the issue was still the same.  I think I’ve found a solution that I want to share with you. 

As a reference point, the computer that I’m using is a Microsoft Surface Pro 3 using Windows 8.1.  Internet Explorer 11 is Version 11.0.9600.17728 Update Versions: 11.0.18 (KB3038314).  I used OneNote’s screen clipping feature to capture website images and Microsoft Paint to mark the web pages.

Problem

Below is an image of what I saw on IE11.  The red boxes show examples of blurry text that I’m referring to – you can probably find more but I’ll just limit it to these. 

image

There appears to be gray shading on the edges of letters and they seem to be more pronounced with uppercase letters and the letters on the titles of each article.

Here is a close-up of some text using Microsoft Paint zooming in at 200%.

image

There is just too much gray in the letters’ edges which leads to blurry fonts.

When I tried using Internet Explorer’s options to change fonts and ignoring font styles specified on webpages it, unexpectedly, affected Microsoft’s News App and Microsoft’s Health & Fitness App. 

Here is how the News App looks normally.

image

Checking the checkbox in Tools->Internet Options->Accessibility->Ignore font styles specified in webpages will fix Internet Explorer font issues but will have side effects.  It causes icons and text to disappear from the News App like so (see the red boxes indicate missing icons).

image

Maybe Microsoft has a technical reason for linking Internet Explorer 11’s settings to the News App or the Health & Fitness App, but whatever it is, the result is annoying and just plain wrong.  However, I’m glad to report that there is a fix – albeit lengthy.

Solution

The fix involves the use of a style sheet that changes the font to a size and style that is more readable.  The reason I use a custom style sheet is because it limits the fix to Internet Explorer 11 and does not affect the News App or the Health & Fitness App.

Steps

  • Create a style sheet by opening Notepad and cut-and-pasting the following text into it.

/*
* Save the file with a .css extension
*/

/*
* This next example changes the font size to large.
* It also says please use calibri as my default font.
* the ‘asterisk’ means apply this to the whole page
* the !important declaration should over-ride any values set by the website.
*/
*
    {font: large calibri, calibri !important;}


  • Save the file to a location where you can find it again.  Make sure to save the file with a “.css” extension.  For example, I saved the file using the name StyleSheet02.css.
  • In Internet Explorer 11, go to Tools->Internet Options

image

  • From within the Internet Options window, left-click on Accessibility

image

  • From the Accessibility window, check the box labeled Format documents using my style sheet like so…

image

  • Then, left-click on the Browse… button to find the style sheet you created from the first step.
  • After you’ve found your style sheet, left-click on the OK button in the Accessibility window, and left-click on the OK button on the Internet Options window.
  • Exit then re-run Internet Explorer once more.  There should be a difference in the way fonts are rendered.

Result

Again, before the fix…

image

The result after the fix

image

I’ve basically changed the font style and size to minimize/remove blurriness.

Again, here is an image before the fix…

image

Here is an image after the fix, again using Microsoft Paint zooming in at 200%.

image

As you can see, at 200% there is still some blurriness in the letters but it has been substantially reduced.

At normal view (without zoom), comparing before..

image

.. and after…

image

This solution might seem a little complicated, but I think the fix is worth it.  There are probably more settings that could be made to the style sheet to improve the webpage even more but I think this is a good start in understanding what style sheets can do.  I hope you found this article helpful.  Have a nice day.

How to fix “Failed to initialize connection subsystem” Cisco AnyConnect VPN error messages

I was trying to log into work but had trouble making a VPN connection.  I am using Cisco AnyConnect Secure Mobility Client Version 3.1.04066, Windows 8.1 Pro on a Surface Pro 3.  This post describes how to fix the following error messages:

  • Failed to initialize connection subsystem

image

The steps to fix this problem are as follows:

1. First make sure you’ve completely exited from the Cisco AnyConnect Secure Mobility Client software before proceeding to the next steps.  It is possible that the program is still running in the background.  Take a look at the Taskbar’s notification icons.  It is possible that the Cisco AnyConnect software has been set to “Hide icon and notifications” or “Only show notifications”.  Right click on the clock portion of the Windows Taskbar then left-click on Customize notification icons.

image

1.a) A new window will open called Notification Area Icons.  In the graphic below, make sure there is a checkmark on Always show all icons and notifications on the taskbar then left-click on the OK Button.  Note that I have also indicated how the Cisco AnyConnect Secure Mobility Client’s icon looks like in a green box.

image

1.b) If there is a Cisco AnyConnect icon on the taskbar, right-click on it then select Quit to fully exit the software.  The Cisco AnyConnect icon should disappear from the taskbar.

image


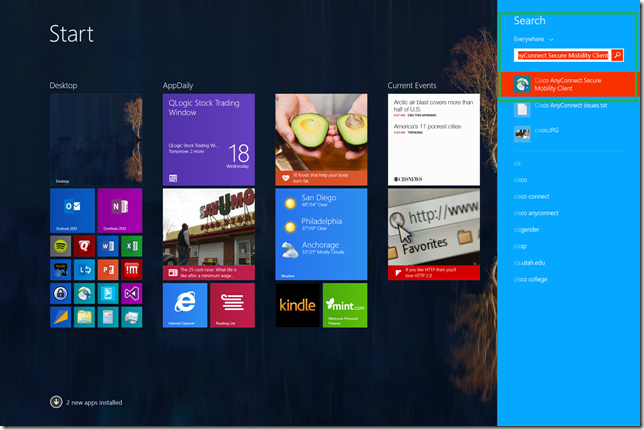
2. Search for the Cisco AnyConnect Secure Mobility Client application by heading to the Start screen and typing “Cisco AnyConnect”.  Windows will search for the program.


image

3. Right-click on Cisco AnyConnect Secure Mobility Client then left-click on Open File Location to open the directory where the Cisco AnyConnect Secure Mobility Client application exists.

image

4. Windows will switch to the Desktop and open File Explorer and show where the Cisco AnyConnect program shortcut is located.  In my case, Windows found the program at this location

image

5. Next, right-click on the shortcut to the program and select Properties

image

6. A Properties window will pop up.  Please do the following steps in order…

Step 1) Left-click on Compatibility,

Step 2) Check the box marked with Run this program in compatibility mode for,

Step 3) Select Windows 7 on the drop down list

Step 4) (Optional) check the box marked with Disable display scaling on high DPI settings – this makes the program look crisp on any display that I use with my Surface Pro 3.  Note that this step has nothing to do with the fix for this issue.  I only did it to make the program’s appearance look clear.

Step 5) Left-click on the Apply button

Step 6) Left-click on the OK button

image


7. Run Cisco AnyConnect Secure Mobility Client and reconnect.  It will probably ask for the username and password used to log into your company.

That’s all there is to it.  Good luck!

Solved! <name> is offline try text instead message on windowsphone

I was getting the following message from my windows phone when I tried to text someone using my Lumia 521.

<name> is offline try text instead

It turns out that I could use either the Text service or Messenger service to communicate to this person.  When I used the Messenger service, I was getting the “… is offline try text instead” message.  By switching from Messenger to Text via the button on the bottom that has two arrows, one pointing left and another pointing right (see green box below), I was able to text using the SMS method (i.e., the texting method I pay my T-mobile carrier for) by selecting text mobile instead of Messenger.  I did this because the Messenger option indicated that the person I wanted to contact was offline.

image

I’m not sure how I got the Messenger program.  Its possible that the Messenger program loaded when I installed Skype on my Windows Phone but I’m not exactly quite sure.  After I uninstalled Skype, the Messenger option was still present next to the person I wanted to contact.

It wasn’t intuitive to do this so I’m posting this solution on my blog hoping that it will help someone.

Good luck!

Possible solution to *E,EXPLPA … expecting a left parenthesis …error message

I was getting the following error message when I was initially creating a Verilog testbench

irun: 11.10-s062: (c) Copyright 1995-2012 Cadence Design Systems, Inc.
file: ./phy_tst.v
   logic [3:0]  TXN;
         |
ncvlog: *E,EXPLPA (./phy_tst.v,44|9): expecting a left parenthesis (‘(‘) [12.1.2][7.1(IEEE)].
   logic [3:0]  TXN;
                   |
ncvlog: *E,EXPLPA (./phy_tst.v,44|19): expecting a left parenthesis (‘(‘) [12.1.2][7.1(IEEE)].
    module worklib.phy_tst:v
        errors: 2, warnings: 0
ncvlog: *F,NOTOPL: no top-level unit found, must have recursive instances.
irun: *E,VLGERR: An error occurred during parsing.  Review the log file for errors with the code *E and fix those identified problems to proceed.  Exiting with code (status 2)

The solution is to add the +sv switch to your simulation command line

irun +sv phy_tst.v

I hope that helps someone out there 😉

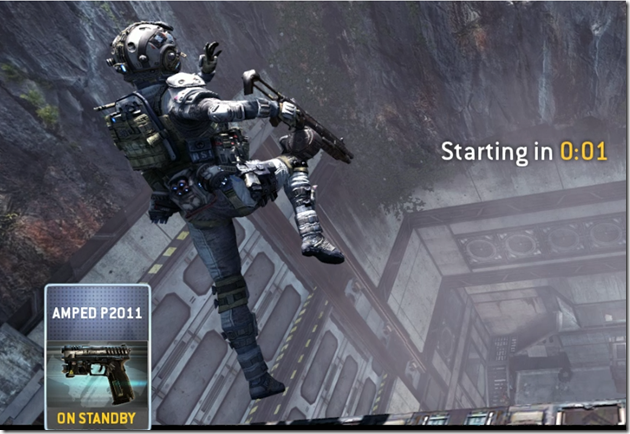
Titanfall Trailer!

Love this trailer!

Gaming.

The new Titanfall trailer! My first next-gen game (Aside from CoD) 😀 I highly recommend it.

View original post

A fix for OneDrive not syncing

Every now and then I see that OneDrive/SkyDrive on my computer doesn’t sync with the cloud.  I find that it usually happens when I go back and forth between a network that has disabled OneDrive (i.e., my work for security reasons) and my home.  I think that when I’m at work, the OneDrive/SkyDrive software keeps trying to sync and ends up getting confused in one way or the other.

I’ve found the solution to this problem.  If you click on this link , it will download and run software that fixes the problem.  When it runs, it could take up to 10-15 minutes to completely fix the problem.

This link was sourced from a Microsoft site found here.  So, if you don’t trust this blog’s download, you can always grab the one from Microsoft.  It is from step 6 of the Answer.

Good luck and have a good day!

Cyclic Redundancy Check (CRC) generation–How to convert a polynomial into a logic circuit that calculates CRC using a parallel equations

This write-up can be supplemented by this article on Wikipedia.

Below is an example of converting CRC-8-ATM polynomial x^8 + x^2 + x + 1 into a parallel circuit for calculating CRC.  I’ll first go through the exercise of how the serial implementation works then describe how to derive a parallel circuit.

The polynomial (x^8 + x^2 + x + 1) converts into a serial implementation like so…

image

For the purposes of clarity, I’ll be calling the flops in this circuit crc. Since this circuit has 8-bits of registers, it creates an 8-bit CRC value or crc[7:0].  In order to create the CRC value, the registers are first loaded with an input message followed by trailing zeroes.  Using the example from the Wikipedia link above, if the input message was 0101_0111 (0x57), the value shifted into the circuit will be 0101_0111_0000_0000 or (0x5700).

To illustrate using more detail, the table below shows the contents of each crc register bit as we shift the input message and trailing zeroes into the serial circuit.  Please note the following:

  • Initially, the circuit’s flops are reset or defaulted to 0.
  • The next value of crc[7] is the contents of crc[6]
  • The next value of crc[6] is the contents of crc[5]
  • The next value of crc[5] is the contents of crc[4]
  • The next value of crc[4] is the contents of crc[3]
  • The next value of crc[3] is the contents of crc[2]
  • The next value of crc[2] is the contents of crc[1] Exclusive-ORed with the contents of crc[7]
  • The next value of crc[1] is the contents of crc[0] Exclusive-ORed with the contents of crc[7]
  • The next value of crc[0] is input Exclusive-ORed with the contents of crc[7]
  •  

      crc[7] crc[6] crc[5] crc[4] crc[3] crc[2] crc[1] crc[0] input
    initial value 0 0 0 0 0 0 0 0 0
    step 1 0 0 0 0 0 0 0 0 1
    step 2 0 0 0 0 0 0 0 1 0
    step 3 0 0 0 0 0 0 1 0 1
    step 4 0 0 0 0 0 1 0 1 0
    step 5 0 0 0 0 1 0 1 0 1
    step 6 0 0 0 1 0 1 0 1 1
    step 7 0 0 1 0 1 0 1 1 1
    step 8 0 1 0 1 0 1 1 1 0
    step 9 1 0 1 0 1 1 1 0 0
    step 10 0 1 0 1 1 0 1 1 0
    step 11 1 0 1 1 0 1 1 0 0
    step 12 0 1 1 0 1 0 1 1 0
    step 13 1 1 0 1 0 1 1 0 0
    step 14 1 0 1 0 1 0 1 1 0
    step 15 0 1 0 1 0 0 0 1 0
    step 16 1 0 1 0 0 0 1 0  

    The final CRC value that is taken from row step 16 is 1010_0010 or 0xA2 in hexadecimal.

    In order to convert the serial circuit to a parallel version, we need to create Exclusive-OR (XOR) equations for each flop.  The symbol for Exclusive-OR is “^”.  We can do this my following a similar method (i.e., shifting) as the previous example except that we use variables instead.  Using a table as before, we still have an 8-bit register, but this time we will call the input variable in[7:0].

      crc[7] crc[6] crc[5] crc[4] crc[3] crc[2] crc[1] crc[0] input
    initial value 0 0 0 0 0 0 0 0 in[7]
    step 1 crc[6] crc[5] crc[4] crc[3] crc[2] crc[1]
    ^ crc[7]
    crc[0] ^ crc[7] in[7] ^ crc[7] in[6]
    step 2 crc[5] crc[4] crc[3] crc[2] crc[1]
    ^ crc[7]
    crc[0] ^ crc[7] ^ crc[6] in[7] ^ crc[7] ^ crc[6] in[6] ^ crc[6] in[5]
    step 3 crc[4] crc[3] crc[2] crc[1]
    ^ crc[7]
    crc[0] ^ crc[7] ^ crc[6] in[7] ^ crc[7] ^ crc[6] ^ crc[5] in[6] ^ crc[6] ^ crc[5] in[5] ^ crc[5] in[4]
    step 4 crc[3] crc[2] crc[1]
    ^ crc[7]
    crc[0] ^ crc[7] ^ crc[6] in[7] ^ crc[7] ^ crc[6] ^ crc[5] in[6] ^ crc[6] ^ crc[5] ^ crc[4] in[5] ^ crc[5] ^ crc[4] in[4] ^ crc[4] in[3]
    step 5 crc[2] crc[1]
    ^ crc[7]
    crc[0] ^ crc[7] ^ crc[6] in[7] ^ crc[7] ^ crc[6] ^ crc[5] in[6] ^ crc[6] ^ crc[5] ^ crc[4] in[5] ^ crc[5] ^ crc[4] ^ crc[3] in[4] ^ crc[4] ^ crc[3] in[3] ^ crc[3] in[2]
    step 6 crc[1]
    ^ crc[7]
    crc[0] ^ crc[7] ^ crc[6] in[7] ^ crc[7] ^ crc[6] ^ crc[5] in[6] ^ crc[6] ^ crc[5] ^ crc[4] in[5] ^ crc[5] ^ crc[4] ^ crc[3] in[4] ^ crc[4] ^ crc[3] ^ crc[2] in[3] ^ crc[3] ^ crc[2] in[2] ^ crc[2] in[1]
    step 7 crc[0] ^ crc[7] ^ crc[6] in[7] ^ crc[7] ^ crc[6] ^ crc[5] in[6] ^ crc[6] ^ crc[5] ^ crc[4] in[5] ^ crc[5] ^ crc[4] ^ crc[3] in[4] ^ crc[4] ^ crc[3] ^ crc[2] in[3] ^ crc[3] ^ crc[2] ^ crc[1]
    ^ crc[7]
    in[2] ^ crc[2] ^ crc[1]
    ^ crc[7]
    in[1] ^ crc[1]
    ^ crc[7]
    in[0]
    step 8 in[7] ^ crc[7] ^ crc[6] ^ crc[5] in[6] ^ crc[6] ^ crc[5] ^ crc[4] in[5] ^ crc[5] ^ crc[4] ^ crc[3] in[4] ^ crc[4] ^ crc[3] ^ crc[2] in[3] ^ crc[3] ^ crc[2] ^ crc[1]
    ^ crc[7]
    in[2] ^ crc[2] ^ crc[1]
    ^ crc[7] ^ crc[0] ^ crc[7] ^ crc[6]
    in[1] ^ crc[1]
    ^ crc[7] ^ crc[0] ^ crc[7] ^ crc[6]
    in[0] ^ crc[0] ^ crc[7] ^ crc[6]  
    Removing any duplicate XOR-pairs to simplify in[7] ^ crc[7] ^ crc[6] ^ crc[5] in[6] ^ crc[6] ^ crc[5] ^ crc[4] in[5] ^ crc[5] ^ crc[4] ^ crc[3] in[4] ^ crc[4] ^ crc[3] ^ crc[2] in[3] ^ crc[3] ^ crc[2] ^ crc[1]
    ^ crc[7]
    in[2] ^ crc[2] ^ crc[1]
    ^ crc[7] ^ crc[0] ^ crc[7] ^ crc[6]
    in[1] ^ crc[1]
    ^ crc[7] ^ crc[0] ^ crc[7] ^ crc[6]
    in[0] ^ crc[0] ^ crc[7] ^ crc[6]  
    Final equations for each crc flip flop in[7] ^ crc[7] ^ crc[6] ^ crc[5] in[6] ^ crc[6] ^ crc[5] ^ crc[4] in[5] ^ crc[5] ^ crc[4] ^ crc[3] in[4] ^ crc[4] ^ crc[3] ^ crc[2] in[3] ^ crc[3] ^ crc[2] ^ crc[1]
    ^ crc[7]
    in[2] ^ crc[2] ^ crc[1]
    ^ crc[0] ^ crc[6]
    in[1] ^ crc[1]
    ^ crc[0] ^ crc[6]
    in[0] ^ crc[0] ^ crc[7] ^ crc[6]  

    The Verilog equations would look like the following:

       always_comb begin

             next_crc[0] = crc[0] ^ crc[6] ^ crc[7] ^ in[0];

             next_crc[1] = crc[0] ^ crc[1] ^ crc[6] ^ in[1];

             next_crc[2] = crc[0] ^ crc[1] ^ crc[2] ^ crc[6] ^ in[2];

             next_crc[3] = crc[1] ^ crc[2] ^ crc[3] ^ crc[7] ^ in[3];

             next_crc[4] = crc[2] ^ crc[3] ^ crc[4] ^ in[4];

             next_crc[5] = crc[3] ^ crc[4] ^ crc[5] ^ in[5];

             next_crc[6] = crc[4] ^ crc[5] ^ crc[6] ^ in[6];

             next_crc[7] = crc[5] ^ crc[6] ^ crc[7] ^ in[7];

       end

    To test that the equations are correct, we apply the input.  However, instead of applying the input serially, we apply it in parallel.  The input we drive in is 0x5700 or 0101_0111_0000_0000

    We first apply the first byte, 0101_0111 (0x57).  Note that the initial values of the crc[7:0] register is 0.


      crc[7] crc[6] crc[5] crc[4] crc[3] crc[2] crc[1] crc[0] input
      0 ^ 0 ^ 0 ^ 0 1 ^ 0 ^ 0 ^ 0 0 ^ 0 ^ 0 ^ 0 1 ^ 0 ^ 0 ^ 0 0 ^ 0 ^ 0 ^ 0 ^ 0 1 ^ 0 ^ 0 ^ 0 ^ 0 1 ^ 0 ^ 0 ^ 0 1 ^ 0 ^ 0 ^ 0 0x57
    contents of crc register after input of 0x57 applied 0 1 0 1 0 1 1 1  

    Next, we apply the second and final byte of trailing zeroes.

      crc[7] crc[6] crc[5] crc[4] crc[3] crc[2] crc[1] crc[0] input
      0 ^ 0 ^ 1 ^ 0 0 ^ 1 ^ 0 ^ 1 0 ^ 0 ^ 1 ^ 0 0 ^ 1 ^ 0 ^ 1 0 ^ 0 ^ 1 ^ 1 ^ 0 0 ^ 1 ^ 1 ^ 1 ^ 1 0 ^ 1 ^ 1 ^ 1 0 ^ 1 ^ 0 ^ 1 0x00
    contents of crc register after input of 0x00 applied 1 0 1 0 0 0 1 0  

    The contents of the CRC register is now 1010_0010 or 0xA2, the same value using the serial version of the circuit after we serially shifted in the last 8 bits of trailing zeroes.

    In cases where the input bus is larger than the CRC value, we can iterate through the shift register the same number of times as the input bus to create the parallel XOR equations for each crc register bit.  Using our previous example, the input bus was 8 bits wide.  If the input bus was 16 bits wide, the crc register bus still stays 8-bits wide but the equation changes.  I’ll leave it to you, the reader, to figure out how to get the result below.

       always_comb begin

             next_crc[0] = crc[0] ^ crc[4] ^ crc[6] ^ crc_in[0] ^ crc_in[14] ^ crc_in[15] ^ crc_in[8];

             next_crc[1] = crc[1] ^ crc[4] ^ crc[5] ^ crc[6] ^ crc[7] ^ crc_in[14] ^ crc_in[1] ^ crc_in[8] ^ crc_in[9];

             next_crc[2] = crc[0] ^ crc[2] ^ crc[4] ^ crc[5] ^ crc[7] ^ crc_in[10] ^ crc_in[14] ^ crc_in[2] ^ crc_in[8] ^ crc_in[9];

             next_crc[3] = crc[1] ^ crc[3] ^ crc[5] ^ crc[6] ^ crc_in[10] ^ crc_in[11] ^ crc_in[15] ^ crc_in[3] ^ crc_in[9];

             next_crc[4] = crc[0] ^ crc[2] ^ crc[4] ^ crc[6] ^ crc[7] ^ crc_in[10] ^ crc_in[11] ^ crc_in[12] ^ crc_in[4];

             next_crc[5] = crc[1] ^ crc[3] ^ crc[5] ^ crc[7] ^ crc_in[11] ^ crc_in[12] ^ crc_in[13] ^ crc_in[5];

             next_crc[6] = crc[2] ^ crc[4] ^ crc[6] ^ crc_in[12] ^ crc_in[13] ^ crc_in[14] ^ crc_in[6];

             next_crc[7] = crc[3] ^ crc[5] ^ crc[7] ^ crc_in[13] ^ crc_in[14] ^ crc_in[15] ^ crc_in[7];

       end

    Again, to test if the circuit is working properly, we apply an input of 0101_0111_0000_0000 (0x5700) in one step.  Again, the initial value of the flops are zeroes.

      crc[7] crc[6] crc[5] crc[4] crc[3] crc[2] crc[1] crc[0] input
      0 ^ 1 ^ 0 ^ 0 1 ^ 0 ^ 1 0 ^ 1 ^ 0 ^ 0 1 ^ 0 ^ 1 ^ 0 1 ^ 0 ^ 0 ^ 0 ^ 1 1 ^ 1 ^ 0 ^ 1 ^ 1 1 ^ 0 ^ 1 ^ 1 0 ^ 1 ^ 0 ^ 1 0x5700
    contents of crc register after input of 0x5700 applied 1 0 1 0 0 0 1 0

    1010_0010 or 0xA2 is the same answer as the previous examples.

    I’ve implemented CRC generators several times but I usually forget how to do it especially when I’ve been working on something else for a long period of time.  I’ve documented it here so I don’t forget and to also help my fellow logic designers.  Although this may not apply directly to the problem you are trying to solve, I hope you find the process of obtaining the crc logic helpful.

    Titanfall Tips

    image

    Its been a long time since I’ve played First Person Shooters and I’ve been playing the production release of Titanfall since it came out on March 11, 2014.  The game is definitely fast-paced and the graphics are enjoyable to watch. 

    When I first started to play the game, I was averaging 0 kills most of the time especially when I played Attrition.  Talk about frustrating!  Now, I currently average between 2-4 kills per match.

    Most of the time, I play Hardpoint.  I find it more enjoyable since there is a goal I can work toward besides just killing the enemy.  I’m nowhere near being a good player yet, so I’m using NVidia’s ShadowPlay to help me improve my game.  ShadowPlay is used to record the game from beginning to end so that I can watch the replay afterwards. 

    Here are my notes after studying my replays.  I’ll continue to update this page as I play more. 

    Things to practice

      1. Jump and spin around to see who is shooting at you
      2. Use the “Q” key to camouflage as often as possible especially when entering into another room through the windows or doors.
      3. As soon as you see someone, shoot!  Don’t wait to recognize whether it’s a teammate or enemy.
      4. Reload while running.  I’ve gotten killed several times while I was standing still reloading.
      5. If you are a Pilot and a Titan sees you, just get out of there.  Don’t go head-to-head against a Titan if you are a Pilot.
      6. Don’t reload while in a firefight.  I got caught up in the heat of a battle that I run out of bullets and I’m reloading in the middle of a fight.
      7. Learn to keep moving while shooting the enemy

      Hardpoint tips

    1. Don’t reload at a Hardpoint.  Switch to Secondary weapon after using Primary weapon.  In this way, you won’t be caught off guard when the enemy pops into view
    2. Don’t be out in the open on the ground especially if there are enemy Titans nearby
    3. Although I hate campers, defending a Hardpoint could potentially increase your kill count
    4. Arcmines are great for defending a Hardpoint

    Microsoft needs to fix SkyDrive so that it works 100% of the time!

    I’m running the 64-bit version of Windows 8.1 Pro.  I noticed that there are times when SkyDrive in File Explorer won’t upload files even if SkyDrive Sync Engine Host is running.  I see this complaint everywhere on the internet.

    In my particular case, I had a PDF file that was 8,264 KB in size.  For some unknown reason, SkyDrive simply didn’t upload the file no matter how long I waited.  I ran skydrive.exe /reset many times and also ran their SkyDrive troubleshooter but to no avail.  I even ran the SkyDrive App and clicked on the Sync button.

    The only way I was able to get SkyDrive to upload the file was to go to my online account, select OneDrive and upload the file using the browser!

    For the most part, I enjoy Microsoft products but its times like these that make me really pissed off about using their products.

    My suggestion would be that they add a way to force uploading/downloading files in File Explorer.  Using the SkyDrive App just doesn’t cut it when I’m in desktop mode.